Activate MFA for your Microsoft account using your web browser
Authenticator.cc is a web browser extension that is compatible with Google Chrome, Microsoft Edge and Firefox. The extension can be used to verify your identity via multi-factor authentication (MFA).
Unlike the Microsoft Authenticator app, authenticator.cc can be installed on a desktop or laptop computer and is therefore accessible to people who do not have access to a smartphone.
Our recommendation is that you use the Microsoft Authenticator app if you can, but Authenticator.cc can be used when a smartphone is not available.
To enable MFA with your web browsers, follow these steps:
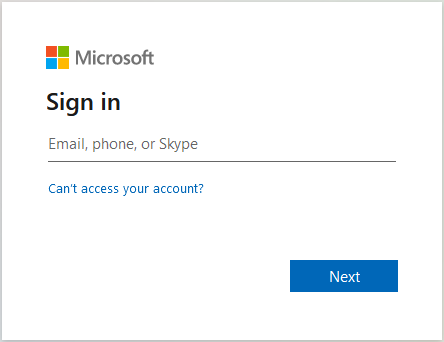
Step 3
In the Microsoft login window, enter your student email address and click "Next."
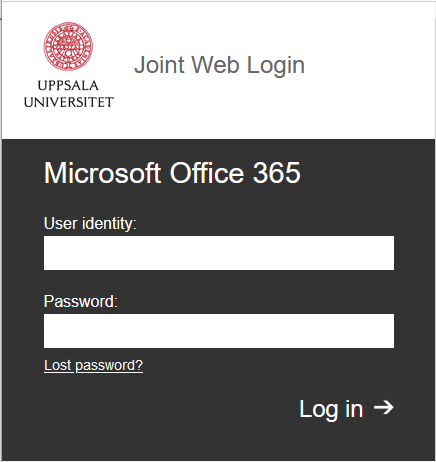
Step 4
In the joint web login window, enter your university ID and password A and then click "Log in".
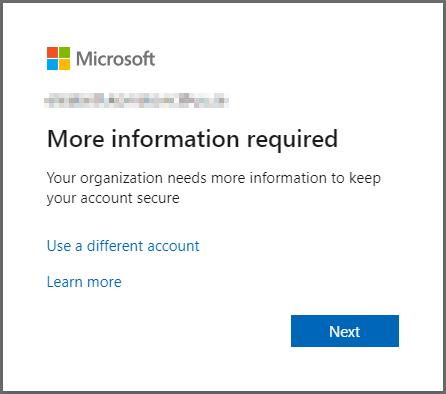
Step 5
If you have not previously enabled MFA, you will receive the following message when logging in to Microsoft services: "More information required. Your organisation needs more information to keep your account secure. Click "Next".
If you already have activated MFA but want to add a new login method, you can use your current authentication method to proceed.
Step 6
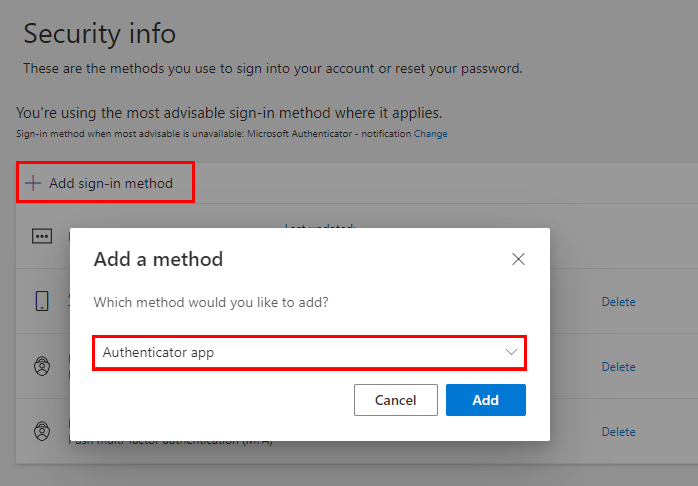
If this is your first time enabling MFA for Microsoft services, skip to step 7.
For those who already have another login method will end up on the "Security info" page. Click "Add sign-in method" and select the "Authenticator app" method. Click "Add".
Step 7
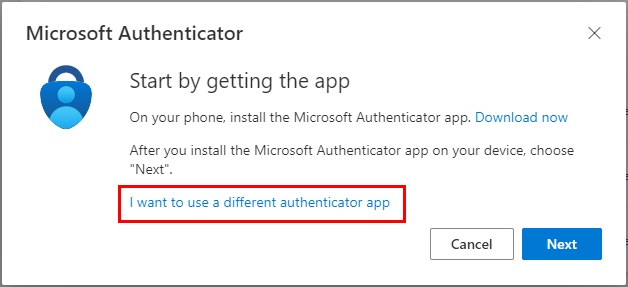
Click the "I want to use a different authenticator app" link.
Step 8
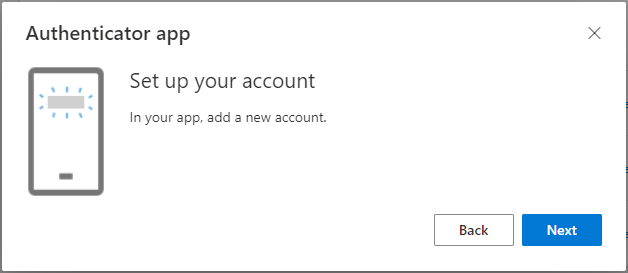
Click "Next" in the "Set up your account" window (make sure the "authenticator.cc" extension is installed).
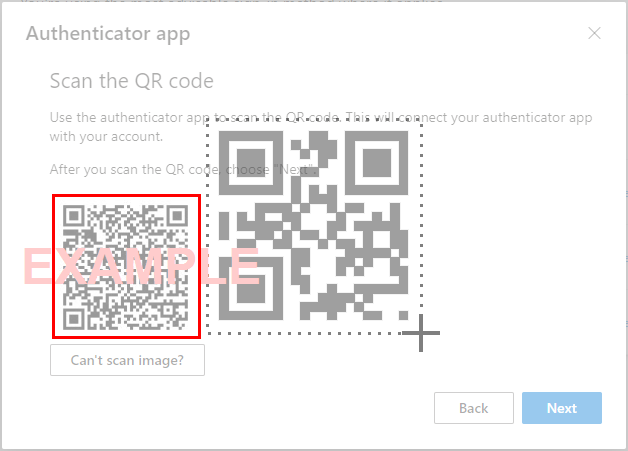
Step 9
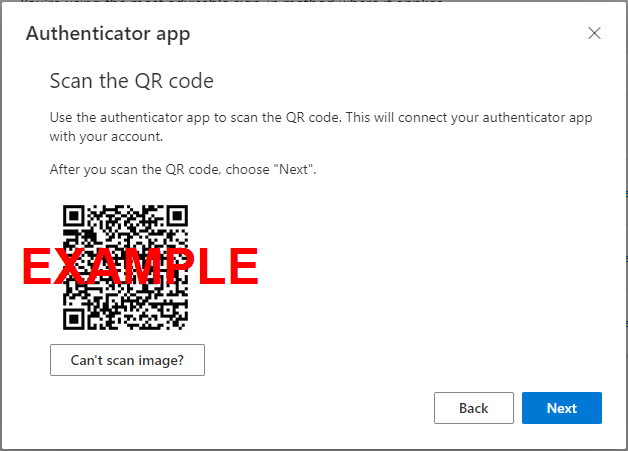
You will now come to the "Scan QR code" window.
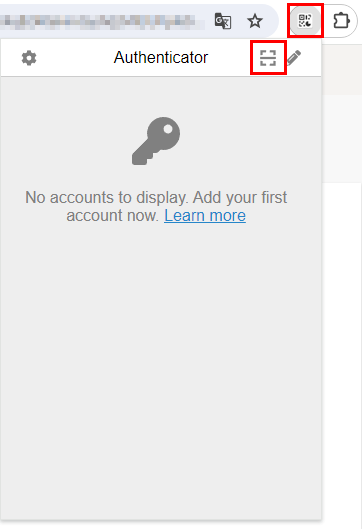
Step 10
To scan the QR code, click the Authenticator extension icon in your browser, then click the scan icon [–] in the upper right corner of the window.
Step 11
Select the QR code with the clipboard tool. After scanning is complete, a pop-up window will appear indicating that your email address has been added. Click "OK" to confirm and then click "Next" in the "Scan QR Code" window.
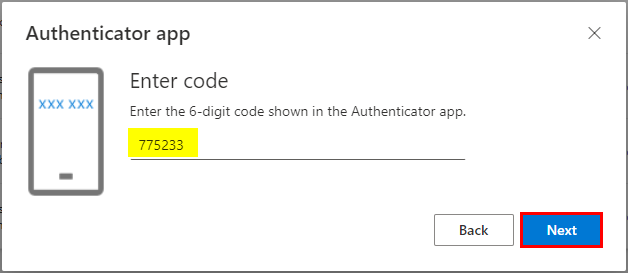
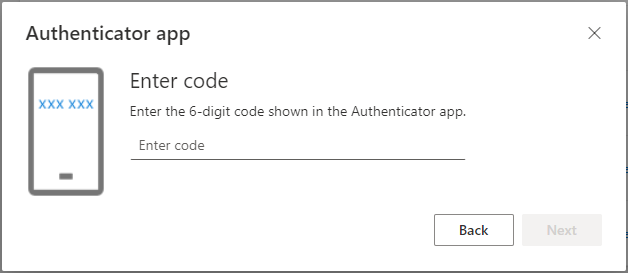
Step 12
You will now be prompted to confirm the six-digit code that your Authenticator extension generates.
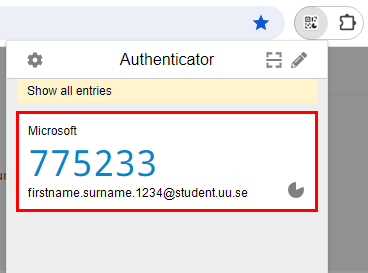
Step 13
To generate the code, click on the Authenticator extension. Then click on the code to copy it to the clipboard.
Note that the code is valid for 30 seconds, then it is replaced.
Step 14
Paste the code in the "Enter code" box. Click "Next" to complete the configuration.